
Crafting a Professional Decorative Concrete Estimate
Jul 31, 2023In the world of decorative concrete, you can set yourself apart with your estimates. We're talking about the actual documentation you send your future customer.
An accurate and comprehensive estimate helps you communicate project details effectively and serves as a blueprint for managing costs and ensuring a smooth workflow.
Not to mention how it will set you apart from your competition.
Elements to Craft a Professional Estimate
Here are the elements you need to craft estimates that impress clients and set the stage for successful projects.
Element #1: Set the Stage with Your Heading
You set the stage to impress your clients by offering a professional proposal.
Grab your customer's attention by including your company name, logo, and contact information, delivering a sense of professionalism and reliability.
Adding the date of preparation helps create a sense of timeliness and attention to detail.
Pro Tip: Inspire your customers and make a good first impression with a professional estimate.
Let me ask you this. Which one inspires you more? A sticky note, chicken scratch on a handwritten composition page, a stock estimate pad from Office Depot, or a custom estimate with all of the details a future customer is looking for and more?
Element #2: Personalize the Estimate with Client Information
Including the client's information makes the estimate more personalized and ensures there is no confusion regarding the intended recipient.
Include the client's name, address, and relevant contact information to demonstrate that you've taken the time to understand their needs.
Our preferred system offers a place to include the project location, which may differ from the client's contact information.
Element #3: Paint a Clear Picture with Project Descriptions
A crucial element of any professional estimate is a comprehensive project description.
Clearly outline the scope of work -- specifying tasks, materials, and any unique requirements.
This helps the client visualize the project and ensures everyone is on the same page right from the start.
We line item everything -- prep grinding, crack repair, staining, sealing -- whatever we're going to do on the project; we include it in a line item.
Stick around to the end because we'll share an example of a line-item description AND share the formula you can use to create your own.
Element #4: Transparency is Key - Include the Breakdown of Costs
Transparency is supreme when it comes to costs.
Provide a detailed breakdown of the expenses associated with the project, such as labor, materials, equipment, and any additional charges or fees.
This breakdown enables clients to understand how the total cost is derived.
Your breakdown will depend on how you run your business. You may calculate costs by the job or by the square foot.
We created a cost per square foot for each line item. This per-square-foot number includes material costs, labor, overhead, and margin.
It's simple, quick, and profitable, so we don't have to recalculate these costs every time.
Element #5: Add Precision with Quantity and Unit Pricing
Where applicable, it's beneficial to include the quantity of materials or labor hours required for each task and the corresponding unit price. This level of detail helps the client understand the cost structure and displays the value of each step.
In our estimates, the quantity (the square foot measurement) and unit pricing (our predetermined price per square foot) are displayed with each line item.
Another way we add precision is to include all the before photos we take at the estimate. This reiterates to the customer that we notice the problem areas and are useful for our crew when it turns into a work order.
Element #6: Set Expectations with Terms and Conditions
Including well-defined terms and conditions is crucial to manage expectations and establish a professional working relationship.
Clearly outline payment terms, warranty information, project timeline or duration, and any specific clauses or requirements.
These terms provide clarity and minimize disputes throughout the project lifecycle.
Our terms and conditions are loaded into our estimate software. From letting our customers know that our deposits are non-refundable to our payment terms and contract terms, we offer clarity to every customer.
Element #7: Avoid Misunderstandings with Disclaimers
To eliminate ambiguity, explicitly mention any items or services that are not covered by the estimate.
This helps manage client expectations and ensures that there are no misunderstandings down the line.
A couple of examples of our disclaimers include that we don't warranty crack repairs and cannot guarantee color-matching from photos.
Element #8: Seal the Commitment with Signature and Acceptance
An estimate should conclude with space for both the contractor and the client to sign and date the document, signifying their acceptance of the terms and conditions.
This formalizes the agreement and serves as a commitment to move forward with the project.
However, in our digital age, we also allow customers to reply to the email, accept the estimate in their customer portal, or simply make a deposit.
Element #9: Build Trust with Additional Information
To instill confidence in potential clients, consider including additional relevant information, such as references, insurance coverage, or certifications.
This showcases your expertise, reliability, and commitment to delivering quality work.
The estimate software we use automatically attaches our:
- Home improvement registration (or your state license depending on how your state does it)
- Reference sheet (this highlights previous customers who have agreed to be references and we update it twice a year)
- Proof of insurance (both workers comp and general liability)
- The estimate in pdf form
- Link to the customer portal
These elements will set you up to create a sound estimate with the information you will need to create the work order.
In fact, with the system we use, when the customer accepts the estimate, it becomes the work order -- the working document for the installation. This gives our crews all the guidance and information needed for the project without duplicating work.
BONUS: Sample Description and Formula to Create Your Own
Here's an example of a line item description in one of our estimates.
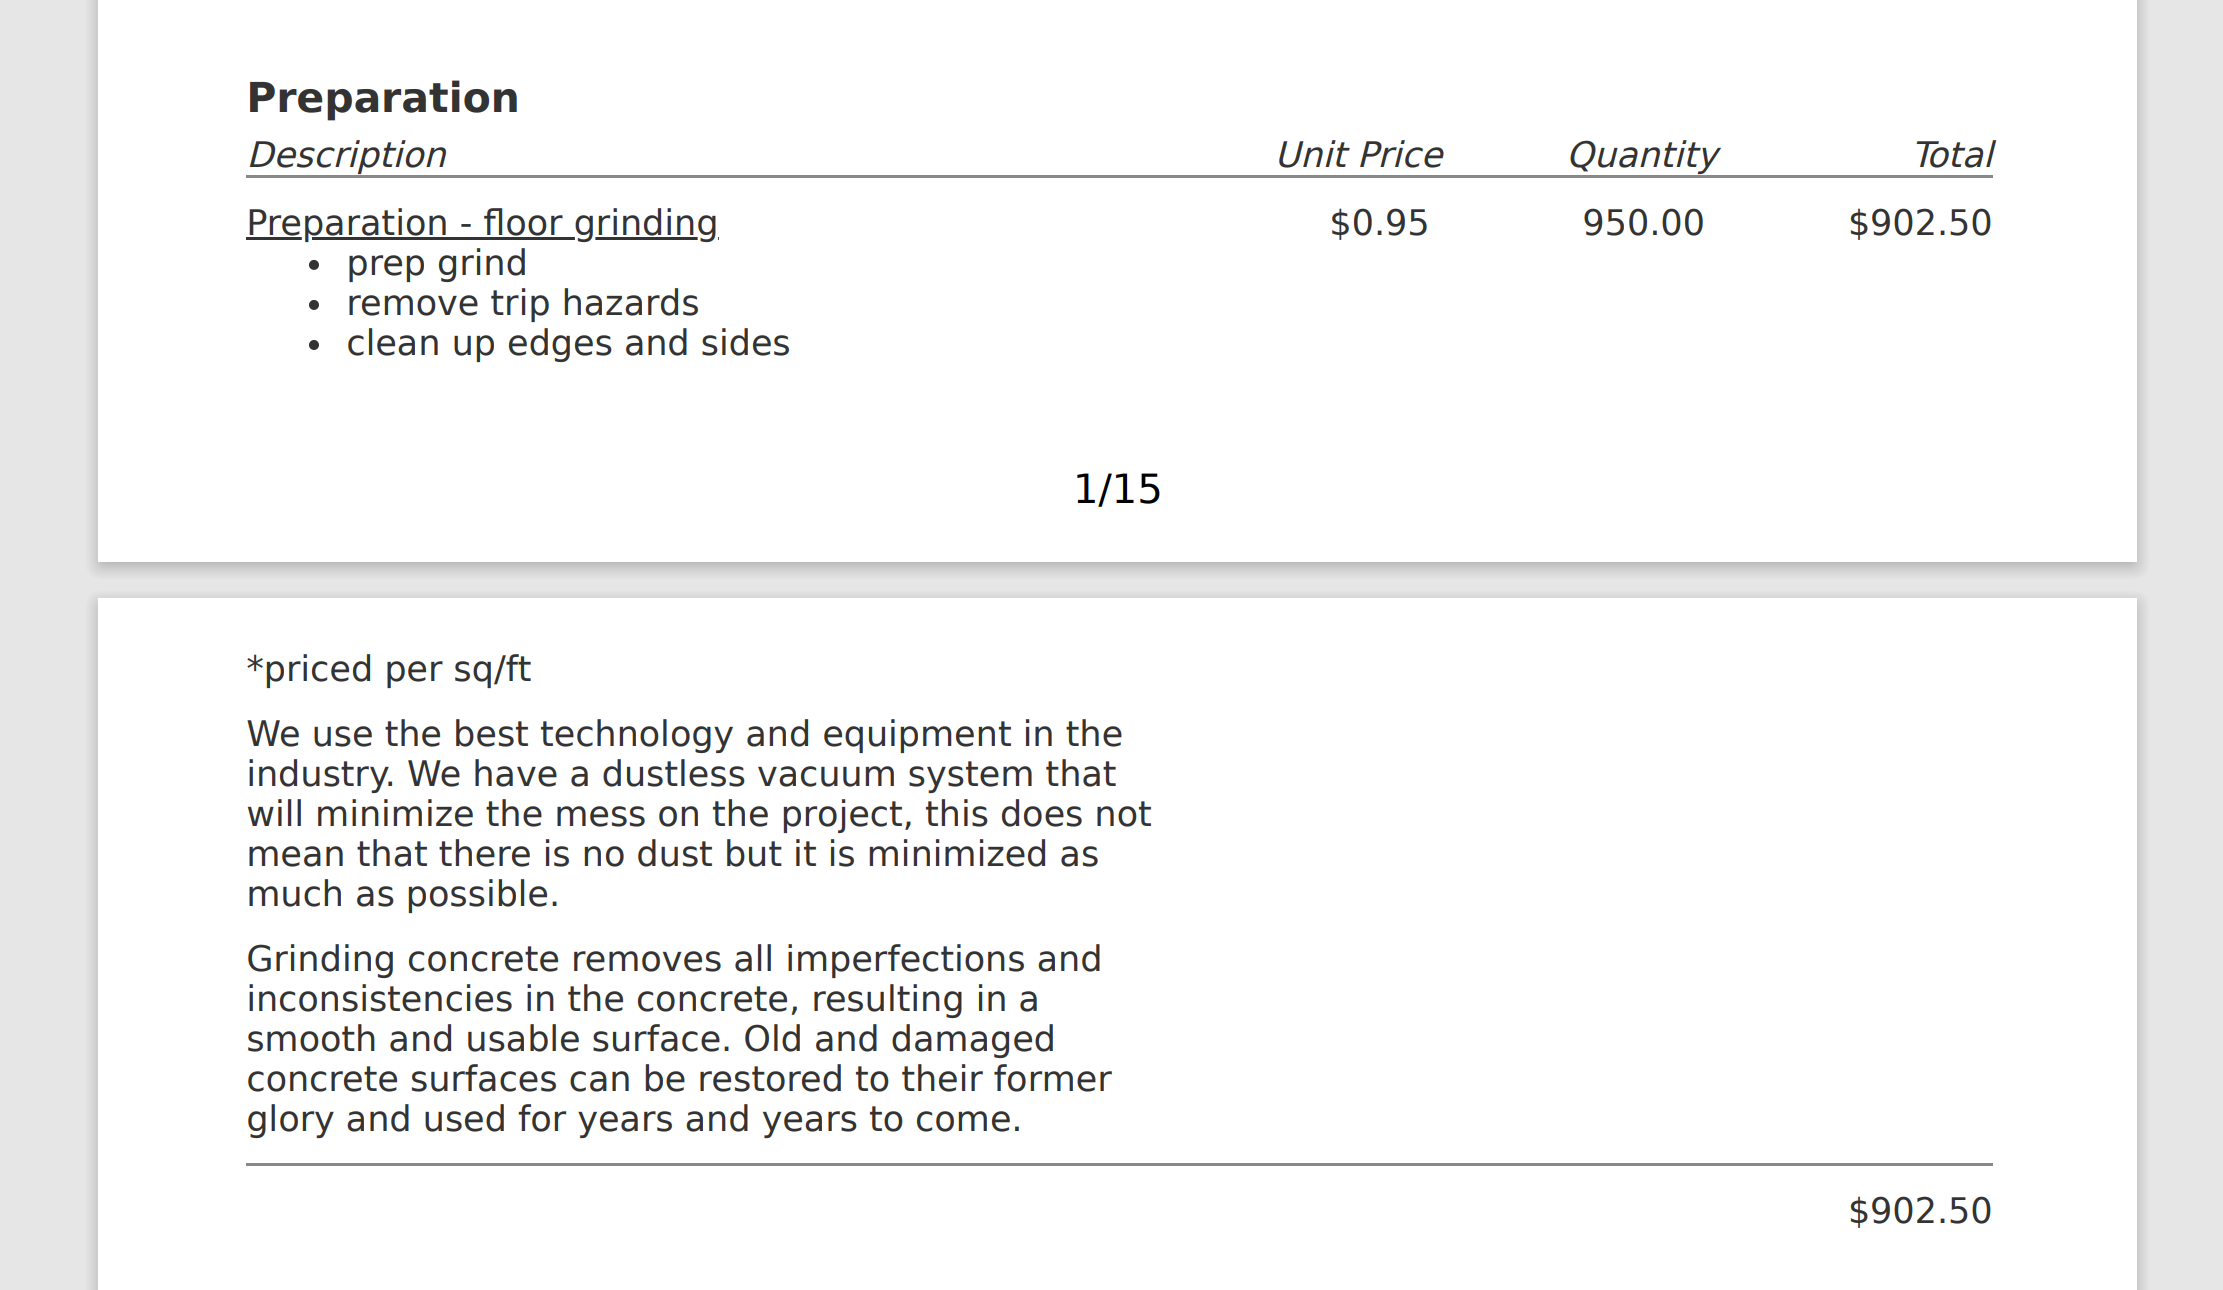
Here is the formula you can use to write your own descriptions:
- What to expect (this details what the customer can expect during this step of the process)
- Add value (this might highlight the equipment you use or the features and benefits of the system you're installing)
- Describe purpose or results (detail why this step is necessary or what the results will be)
So there you have it.
All the elements you need to create a compelling and professional estimate AND a formula to create your own line-item descriptions.
If you're ready to upgrade your estimates, our one-session Business Boost coaching call might be just what you need to finish the task.
If you're ready to launch or re-launch your decorative concrete business, we'd love to be your partner for success, whether it's investing in our online course or opting for custom coaching.
Be sure to subscribe to our YouTube channel for more tips to launch and propel your decorative concrete company forward. And sign up for our email list below so you never miss new targeted advice for launching and optimizing your decorative concrete business.
Become a Decorative Concrete Engine Insider Today!
Join our mailing list to receive the latest news and updates from DCE.
Don't worry. Your information will not be shared.
We hate SPAM. We will never sell your information, for any reason.
